To apply my knowledge of depth to taking some example photos, I used the same model who held out different objects and I shifted the focus and changed the apeture and F stop to make it suitable for the picture to get the right exposure. I did this for shallow and wide depth of field.
Shallow depth of field:
I liked this image as it is a very clear example of shallow depth of field. This is as the focus is only on the shoe and the model in the background is blurred, this emphasises the definition of the shoe. To take this I had an F stop of 5.6 to create the blurred background. I had the shutter speed in 1/125 and to help get the perfect exposure on the image I put my camera on manual mode.
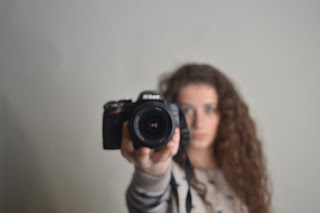
The two images above both have the same shutter speed and F stop as the first picture however I shifted the focus to be on the model rather than the camera. I think the first one didn't work so well as the models face is not entirely in the shot as it's covered a lot by the camera she is holding. I think this makes the difference in focus a lot less obvious this could make it more difficult to differentiate the layers in the picture.
I really liked the second picture as the whole of her face can be seen this makes it easy to make her the focus of the picture. The camera is slightly blurred as it isn't in focus. I liked how sharp her eyes are as she is looking directly into the camera and I think this draws even more attention to her as the focus point of the picture.
Progression
I was not to keen on this picture as it shows no focus as all of the picture is blurred. I think this makes the picture lack any sort of depth and it means there is no focus point. Therefore the whole image is quite bland and seems as if theres not much to it. To improve the quality of this shoot I would have made sure I had a focus point to all my images to show the shallow depth of field.
Wide Depth of field:
To show this wide depth of field I changed my camera to have a F stop of 21. This allowed the whole frame of the image to be in focus. To show this technique I shot photos of a model holding a hat to show how they are both in focus.
I wasn't to keen on this one as I think I took the photo from to far away so it's difficult to see the effect of the wide depth of field.
I think this image worked better to show this technique as we can clearly see both the hat and face is in focus.
More Examples:
After practising these techniques and camera settings in the studio I went outside to see the effect that background has on depth of field.
This image shows quite a wide depth of field as the background and the model is in focus.
I really liked this image as it shows a shallower depth of field as the backgound is slightly blurred but the model is in focus. I think this depth of field works best with pictures like this where there is a portrait of someone against quite a plain background. I think this is because it then draws more attention to the person and makes them stand out more.
This image shows the use of a vingette, I made this quite a strong vignette to make her face seem really illuminative.
This shows the processes that I put in the image above.
I also used a vignette on this picture. Considering its a shallow depth of field picture, I liked how the background was therefore slightly blurred so I think the vignette made her stand out from the background even more which creates a defined background and foreground.
This shows the editing processes that I put on the image above.


place progression entry toward the bottom of the page and link with photos that you might want to do idf you had the time to explore the topic further..
ReplyDeleteon some images there is a need for further editing a stretch task for you is to aply a vignette to the portrait image of Kaya.